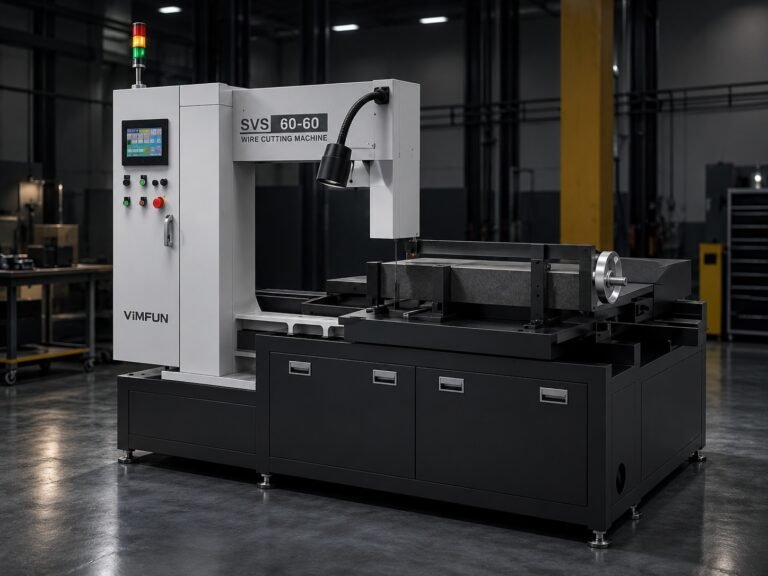
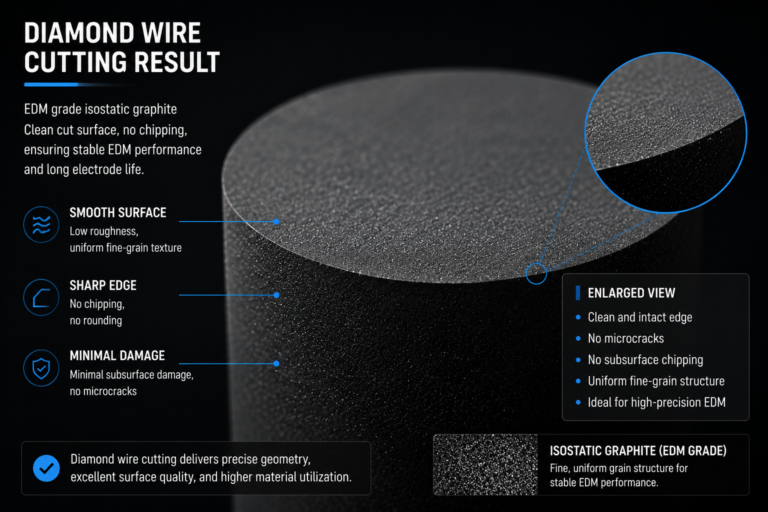
On a 500 × 300 mm block of high-purity isotropic graphite, every additional 0.1 mm of kerf across 20 cuts translates to roughly 200 mm³ of unrecoverable material—material you already paid for, and material that shows up as scrap in your monthly cost review. In high-value grades, that is not a rounding error. It is a line item.
Yet most operations trying to reduce kerf loss reach for the wrong lever first. They swap in a thinner cutting tool, run a few test cuts, see a small improvement, and stop. The problem is that tool width is only the visible part of kerf—the rest is process-induced spread that a thinner tool cannot fix by itself, and sometimes makes worse.
This guide walks through the five factors that actually determine kerf loss in graphite cutting: what each one does, how they interact, and where the practical limits are. If you want the broader cost and yield perspective on why kerf matters in the first place, see the Pillar 4 overview on low-kerf graphite cutting. This page is the operational companion.

What Determines Kerf Loss in Graphite Cutting
Kerf is the width of material removed by a single cut. In practice, measured kerf is always wider than the nominal tool width, because the cutting process introduces its own contribution—vibration, path deviation, edge chipping, and thermal effects at the cut face. The gap between “tool width” and “measured kerf” is where most of your controllable loss lives.
Reducing kerf loss is therefore not a single-variable problem. It is a system problem. The five factors below are ordered roughly by how often we see them ignored, not by absolute importance. In most graphite operations, batch consistency (Factor 5) delivers more real savings than tool width (Factor 1), even though tool width gets 90% of the attention.
Factor 1: Cutting Tool Width and Stability
Tool width matters, but stability during the cut matters more. A 0.20 mm cutting tool that deflects to an effective 0.28 mm under load produces the same kerf as a 0.28 mm tool that stays straight—except the “thin and unstable” version usually has worse edge quality and shorter tool life.
When evaluating a cutting tool for kerf performance, look at three specifications together, not one:
- Nominal width (the number on the spec sheet)
- Deflection under working load (rarely on the spec sheet—ask, or test)
- Wear pattern over service life (does the tool widen uniformly, or does it develop uneven zones?)
The common mistake is to select the tool with the narrowest nominal width and assume kerf follows. It does not. A tool with 15% wider nominal width but half the deflection can produce a narrower and more consistent kerf across a full production run.
A practical rule from operations: if you cannot measure your tool’s deflection under working conditions, you should not assume it matches the spec sheet. Deflection data from a bench test at room temperature tells you very little about behavior during a two-hour cut on a warm machine.
Factor 2: Feed Rate and Cutting Path Control
Feed rate has a non-linear relationship with kerf. Push too slow and you build up heat, which widens the effective kerf through thermal spread. Push too fast and you introduce vibration and edge chipping, which also widens kerf. The optimum is a band, not a point.
Path control is the less obvious half of this factor. Even at optimal feed, a cutting path that oscillates laterally by ±0.05 mm produces an effective kerf that is 0.1 mm wider than the tool—regardless of how narrow the tool actually is. In long cuts on large graphite blocks, path deviation is often the single largest contributor to kerf loss.
Diagnostic sequence when kerf is drifting:
- Measure kerf at the start, middle, and end of a single cut
- If kerf widens toward the end → thermal drift, reduce feed rate or improve cooling
- If kerf varies mid-cut without a trend → path stability issue, check machine rigidity and any lateral load
- If kerf is uniform per cut but drifts across a batch → tool wear or fixture shift (see Factors 3 and 5)
This sequence takes 20 minutes on the shop floor. Skipping it and instead spending three days evaluating new tools is a common mistake.
Factor 3: Material Fixture and Vibration Damping
Graphite is stiff but brittle. A fixture that cannot suppress workpiece vibration during the cut will produce kerf variation that no tool selection can compensate for. In our experience, fixture-induced kerf noise is roughly 2–3× more common than tool-related kerf variation, and it is almost never the first thing operations check.
The fixture failure modes worth watching:
- Insufficient clamping stiffness on large blocks—the block flexes microscopically against the cut and the kerf tracks the flex
- Point-load clamping rather than distributed clamping, which allows local rotation
- Fixture wear over time—clamping surfaces develop marks and lose contact area, which increases with fixture age
For small parts, the reverse problem appears: excessive clamping force can locally deform soft graphite grades, again shifting the effective kerf. There is no single “right” clamping force—it depends on part geometry, graphite grade, and the cutting direction relative to the material grain.
If you inherit a fixture with a job, do not assume it is optimized. Run a kerf comparison against a temporary rigid setup before accepting the fixture’s performance as baseline.
Factor 4: Coolant and Lubrication Strategy
Coolant does two things for kerf control: it removes heat that would otherwise widen the effective cut through thermal expansion, and it flushes cutting debris that would otherwise re-enter the kerf and widen it through secondary abrasion.
Dry cutting is possible for graphite and is often used for cleanliness reasons—the resulting powder is easier to collect than a slurry. But dry cutting almost always produces measurably wider kerf than wet cutting on the same material, typically by 5–15% depending on cut length and speed. If your operation is dry for downstream contamination reasons, that trade-off is legitimate. If it is dry because “graphite doesn’t need coolant,” you are paying for that assumption in kerf.
For wet cutting, the two common mistakes are:
- Dirección incorrecta del flujo de refrigerante relativo a la trayectoria de corte; si el flujo no elimina los residuos de la ranura, los residuos vuelven a cortar la cara de la ranura
- Caudal insuficiente para la profundidad de corte; el refrigerante necesita llegar a la zona de trabajo, no solo rociarla cerca
La selección del refrigerante en sí importa menos de lo que la mayoría de la gente piensa, una vez que se tiene el flujo y la dirección correctos. La mayoría de las operaciones que vemos están utilizando un refrigerante adecuado con una entrega inadecuada.
Factor 5: Consistencia del proceso entre lotes
Este es el factor que la mayoría de las operaciones descubren al final, y suele ser el que más ahorros genera. Reducir la ranura promedio en un 10% vale algo. Reducir la desviación estándar de la ranura en un lote de 100 piezas en un 30% vale sustancialmente más, porque se traduce directamente en una menor tasa de desechos y un anidamiento posterior más ajustado.
La deriva de la ranura en un lote proviene de tres fuentes:
- Desgaste de la herramienta—la herramienta de corte se ensancha gradual y predeciblemente
- Deriva del accesorio—las superficies de sujeción se desplazan micro-cantidades a medida que el accesorio se calienta
- Degradación del refrigerante—el fluido de corte recoge residuos y su enfriamiento efectivo cambia
La respuesta correcta no es “arreglar” cada fuente individualmente en el momento en que comienza a afectar la ranura. Ese es un juego perdido. La respuesta correcta es construir un proceso que tolere la deriva mediante:
- Establecer una línea de base de la ranura en la Pieza 1 del lote
- Muestrear la ranura cada N piezas (típicamente cada 10-20 dependiendo del tamaño del lote)
- Establecer un umbral de deriva que active una acción (cambio de herramienta, refresco de refrigerante o verificación del accesorio)
- Documentar cuándo se activó cada disparador, para construir un conjunto de datos sobre las tasas de deriva del mundo real
Si solo tiene tiempo para implementar una cosa de esta guía completa, implemente el paso 3: un umbral de deriva definido y una respuesta documentada. Esto solo reduce típicamente la varianza de la ranura a nivel de lote más que cualquier cambio de herramienta.
Para una mirada más profunda a cómo la consistencia del lote se traduce en números de rendimiento, consulte la página complementaria centrada en el rendimiento sobre mejora del rendimiento del corte de grafito.
Qué medir y cómo rastrear la reducción de la ranura
No necesita máquinas de medición por coordenadas ni perfilómetros ópticos para establecer líneas de base de ranura útiles. Un calibrador digital calibrado o un comparador óptico de bajo costo es suficiente para la mayoría de las operaciones de grafito, siempre que mida de manera consistente.
Las tres métricas que vale la pena rastrear:
- Ranura media por corte—el ancho promedio a lo largo de un solo corte
- Desviación estándar de la ranura dentro de un corte—cuánto varía la ranura a lo largo de la longitud
- Desviación estándar de la ranura del lote—cuánto varía la ranura media de pieza a pieza en un lote
Una revisión semanal de estos tres números, graficados frente a la edad de la herramienta, la edad del refrigerante y cualquier cambio en el proceso, vale más que una revisión mensual de una docena de métricas adicionales. La complejidad no es lo que mejora la ranura. La medición consistente lo hace.
Una sugerencia práctica: rastree la ranura en un gráfico de pared, no solo en una base de datos. Un gráfico visible en el taller cambia el comportamiento del operador de una manera que un informe de base de datos no lo hace. La disciplina de medición se refuerza a sí misma cuando es visible.
Cuándo no perseguir una ranura más baja
No todas las operaciones de grafito se benefician de una reducción agresiva de la ranura. Si el costo de su pieza está dominado por el tiempo de mecanizado posterior, y el costo del material por pieza es una pequeña parte del costo total, entonces reducir la ranura en un 20% puede reducir el costo total solo en un 2-3%. Eso es real, pero puede que no justifique la inversión en el proceso.
Las operaciones que más se benefician de una reducción seria de la ranura comparten tres características:
- El costo del material es una parte significativa del costo total de la pieza (típicamente 30%+)
- Los tamaños de lote son lo suficientemente grandes como para que la consistencia importe
- Los procesos posteriores no pueden recuperarse fácilmente de la variación de la ranura (es decir, no hay un paso de acabado indulgente)
Si cumple las tres, los factores de esta guía se aplican directamente. Si solo cumple una, tenga cuidado con cuánto invierte en la reducción de la ranura frente a otras palancas de rendimiento.
Lectura relacionada
- Corte de Grafito de Bajo Kerf: Pérdida de Material, Rendimiento e Impacto en el Costo de Fabricación — la perspectiva de costos y económica sobre por qué importa la ranura
- Mejora del rendimiento del corte de grafito — cómo el control de la ranura se conecta con el rendimiento general
- Pérdida de material en el mecanizado de grafito — comparación de la pérdida de ranura con la eliminación de virutas en el mecanizado
- Precision Graphite Slicing — proceso relacionado para aplicaciones de corte de alta precisión