Every precision graphite plate starts as a clean cut. But between the wire entering the block and the finished plate arriving at inspection, multiple things can go wrong. Edge chipping. Surface scratches. Micro-cracks. Breakage. Each defect has a specific cause, and each cause has a fix — if you know where to look.
Graphite slicing defects don’t just reduce yield. They cascade downstream. A chipped edge means a smaller usable area. A scratched surface means additional lapping. A micro-crack means a plate that fails under thermal cycling in a fuel cell stack or EDM application — potentially weeks or months later.
This article catalogs the most common graphite slicing defects, explains why each occurs, and provides practical prevention strategies.

Types of Graphite Slicing Defects
1. Edge Chipping
What it looks like: Small chunks of graphite break away from the plate edge where the wire exits the cut. Chip sizes range from 0.1 mm (barely visible) to 2–3 mm (clearly visible, functionally damaging).
Why it happens: Graphite is brittle. When the diamond wire reaches the edge of the block, the thin remaining material on the exit side can’t support the cutting force. Instead of being cut cleanly, it fractures. The problem is worse with:
- Coarser graphite grades (grain size > 20 μm) — larger grains create larger chip-out zones
- Higher feed rates — more force at the exit point
- Unsupported exit edges — no backing material to prevent breakout
How to prevent it:
| Method | Effectiveness | Trade-off |
|---|---|---|
| Reduce feed rate near exit | Haut | Slower cycle time |
| Bond sacrificial backing block | Haut | Extra setup time |
| Use fine-grain isostatic graphite | Haut | Higher material cost |
| Program gradual feed deceleration | Medium-High | Requires CNC capability |
The most reliable fix is a sacrificial backing block — a piece of low-cost graphite bonded to the exit side of the workpiece. The wire cuts through the workpiece and into the backing material, so the exit breakout occurs in material you don’t care about.
Edge chipping is the single most common graphite slicing defect. If you solve nothing else, solve this one.
2. Surface Scratches and Score Marks
What it looks like: Linear marks on the cut surface running parallel to the wire direction. Visible under side lighting or measured as localized roughness spikes on a profilometer trace.
Why it happens: Debris re-cutting. Graphite particles generated during cutting get trapped between the wire and the freshly cut surface. As the wire continues to move, these particles scratch the surface. This is fundamentally a coolant problem — the coolant’s job is to flush debris from the kerf before it can cause damage.
Other causes include:
- Loose diamond grains from the wire coating acting as uncontrolled abrasive
- Wire guide contamination — debris buildup on guide rollers transfers marks to the wire path
- Block contamination — foreign particles embedded in the graphite surface before cutting
How to prevent it:
- Increase coolant flow rate and verify it reaches the full depth of the cut
- Use filtered coolant to prevent recirculated debris from re-entering the cut
- Clean guide rollers regularly during production shifts
- Inspect incoming graphite blocks for surface contamination
For graphite, water-based coolant at adequate flow rate is sufficient. The key is delivery — coolant must penetrate the kerf, not just wash over the block surface.

3. Wire Marks (Waviness)
What it looks like: A wavy or rippled texture on the cut surface, with a periodic pattern matching the wire oscillation frequency. Surface roughness measurements show a regular waviness component superimposed on the normal roughness.
Why it happens: Wire vibration during cutting. The diamond wire is not perfectly rigid — it vibrates laterally as it moves through the cut. This vibration imprints onto the cut surface as a periodic pattern.
Wire vibration increases with:
- Lower wire tension (less damping)
- Higher wire speed (more dynamic instability)
- Longer unsupported wire span
- Worn or misaligned guide rollers (introducing forced vibration)
How to prevent it:
- Increase wire tension (within safe limits)
- Replace worn guide rollers — a common but often overlooked maintenance item
- Ensure proper wire tracking on all rollers
- For critical applications, reduce wire speed slightly to lower vibration amplitude
Wire marks affect surface roughness (Ra) but typically don’t affect platitude significantly — they’re a surface texture issue rather than a geometric accuracy issue.
4. Micro-Cracks
What it looks like: Hairline cracks visible under magnification (10–50×) or detected by dye penetrant inspection. May not be visible to the naked eye. Located on cut surfaces or emanating from edges.
Why it happens: Excessive cutting force introduces stress into the graphite surface layer. Graphite has low tensile strength — when the stress exceeds the material’s strength locally, micro-cracks form. Contributing factors:
- Aggressive feed rate — high cutting force exceeds the graphite’s fracture resistance
- Worn wire — lost diamond abrasive means more friction and more force per remaining diamond particle
- Thermal shock — rapid temperature changes (e.g., aggressive coolant on a hot cut zone) can crack the surface
- Pre-existing flaws — voids or inclusions in the graphite block act as stress concentrators that initiate cracks during cutting
Why it’s dangerous: Micro-cracks may not cause immediate rejection. The plate passes visual inspection and dimensional checks. But under thermal cycling (fuel cell operation, EDM discharge heating), the cracks propagate. A plate that worked fine for 100 hours fails at hour 200.
How to prevent it:
- Use moderate feed rates appropriate for the graphite grade
- Monitor wire condition and replace before severe wear
- Maintain consistent coolant temperature — avoid cold coolant on hot workpieces
- For critical applications, inspect cut surfaces at 20× magnification minimum
5. Plate Breakage
What it looks like: The plate fractures during or immediately after cutting. Complete break into two or more pieces.
Why it happens: Breakage is the extreme case of several other defects combined:
- Cutting through a void or crack in the block — the plate has no structural integrity at that point
- Cutting too thin — plates below 1 mm in most graphite grades are fragile enough that normal handling forces cause fracture
- Excessive cutting force on thin plates — the plate flexes and snaps before the cut is complete
- Improper plate removal — prying or bending the plate away from the block instead of carefully separating it
How to prevent it:
- Inspect blocks for voids before cutting (ultrasonic inspection for high-value blocks)
- For plates < 2 mm thick, reduce feed rate significantly and handle with care
- Never pry plates from the block — use the machine’s separation cycle or carefully break the adhesive bond
- Support thin plates from below during separation to prevent bending
6. Taper and Wedge Defects
What it looks like: The plate is thicker on one side than the other, measurable as a parallelism error. This is technically a dimensional defect, not a surface defect, but it originates from the cutting process.
Why it happens: Uneven wire tension, block misalignment in the fixture, or asymmetric wire wear. See our detailed guide on flatness and parallelism for causes and fixes.
Graphite Slicing Defects by Graphite Grade
Not all graphite grades are equally prone to slicing defects. The manufacturing method and grain size have a direct impact:
| Graphite Type | Grain Size | Chipping Risk | Cracking Risk | Qualité de la surface |
|---|---|---|---|---|
| Isostatic (fine grain) | 1–10 μm | Faible | Faible | Excellent |
| Isostatic (medium grain) | 10–20 μm | Low-Medium | Faible | Good |
| Extruded | 50–200 μm | Haut | Moyen | Fair |
| Molded | 20–100 μm | Medium-High | Moyen | Fair-Good |
For precision applications where graphite slicing defects must be minimized, isostatic-pressed fine-grain graphite is the standard choice. Major graphite suppliers like SGL Carbon et Toyo Tanso publish grain size and mechanical property data for each grade — use this data to select the right grade before cutting begins.
Attempting to cut extruded graphite to the same tolerances as isostatic graphite using the same parameters will produce significantly more defects. Adjust your expectations and parameters to the grade.
Defect Detection Methods
| Defect | Detection Method | When to Inspect |
|---|---|---|
| Edge chipping | Visual inspection (naked eye) | Every plate |
| Surface scratches | Side lighting + 5× magnification | Every plate or sampling |
| Wire marks | Profilometer (waviness filter) | Sampling or complaints |
| Micro-cracks | Dye penetrant or 20× magnification | Critical applications |
| Plate breakage | Obvious | Immediate |
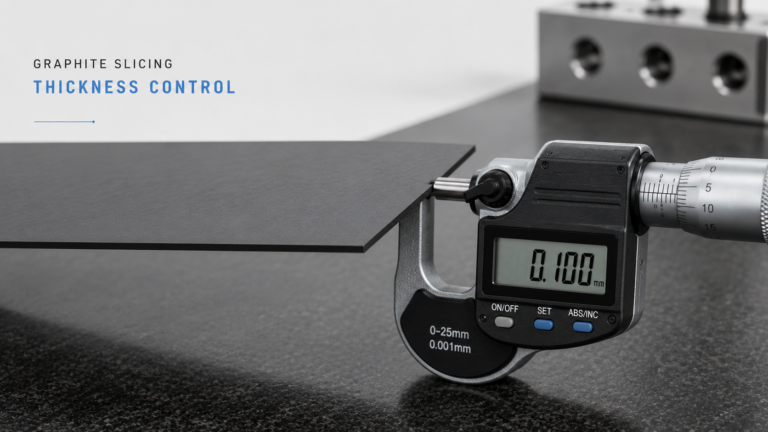
| Taper/wedge | Thickness measurement at 4+ points | Every plate |
For production environments, a practical inspection protocol is:
- 100% visual for edge chipping and breakage (2 seconds per plate)
- 100% thickness measurement at 4 points for taper/wedge (10 seconds per plate)
- 10% sampling under side lighting for surface scratches
- Critical applications only: dye penetrant or magnified inspection for micro-cracks

Root Cause Analysis: Connecting Defects to Process Parameters
When graphite slicing defects appear, trace them back to the process:
| Defect Pattern | Most Likely Cause | First Action |
|---|---|---|
| Chipping on exit side only | No backing block, high exit feed | Add sacrificial block, reduce exit speed |
| Scratches on all plates | Coolant flow insufficient | Increase flow, check nozzle direction |
| Waviness pattern | Wire vibration | Check guide rollers, increase tension |
| Micro-cracks after thermal test | Aggressive feed or thermal shock | Reduce feed rate, stabilize coolant temp |
| Taper consistent across batch | Block misalignment | Re-fixture, verify perpendicularity |
| Random breakage | Block voids | Improve incoming inspection |
Preventing Graphite Slicing Defects: Summary Checklist
- Select the right graphite grade for your tolerance requirements
- Inspect incoming blocks for voids, cracks, and density uniformity
- Use sacrificial backing blocks to eliminate exit-side chipping
- Maintain adequate coolant flow to flush debris from the kerf
- Monitor wire condition — replace on schedule, not on failure
- Match paramètres de coupe to the grade — what works for isostatic graphite doesn’t work for extruded
- Measure every plate for thickness and edge condition at minimum
- Track defect rates by type — rising rates signal process drift before catastrophic failure
Pour une vue complète de la manière dont la prévention des défauts est liée au contrôle de l'épaisseur, kerf loss, and overall découpe de graphite de précision quality, see our pillar guide.